TLS 1.2 with Classic ASP

Looking at Twillio docs Using Twilio with Classic ASP and VBScript we implanted Twillio SMS API

We encountered the following error message:


Invalid TLS version
Upgrade Requiredhttps://www.twilio.com/docs/errors/20011426

The TLS versions on the server appreared to be causing the error TLS 1.0, TLS 1.1 and TLS 2.0

We used https://www.ssllabs.com/ssltest to get the current TLS Configuration.

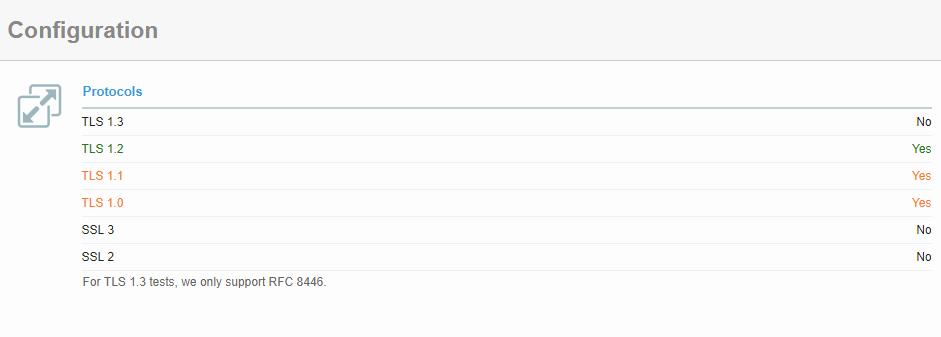
The results showed TLS 1.0 and TLS 1.1 where enabled. This was causing the issue as we need TLS 1.0 and TLS 1.1 to be removed.

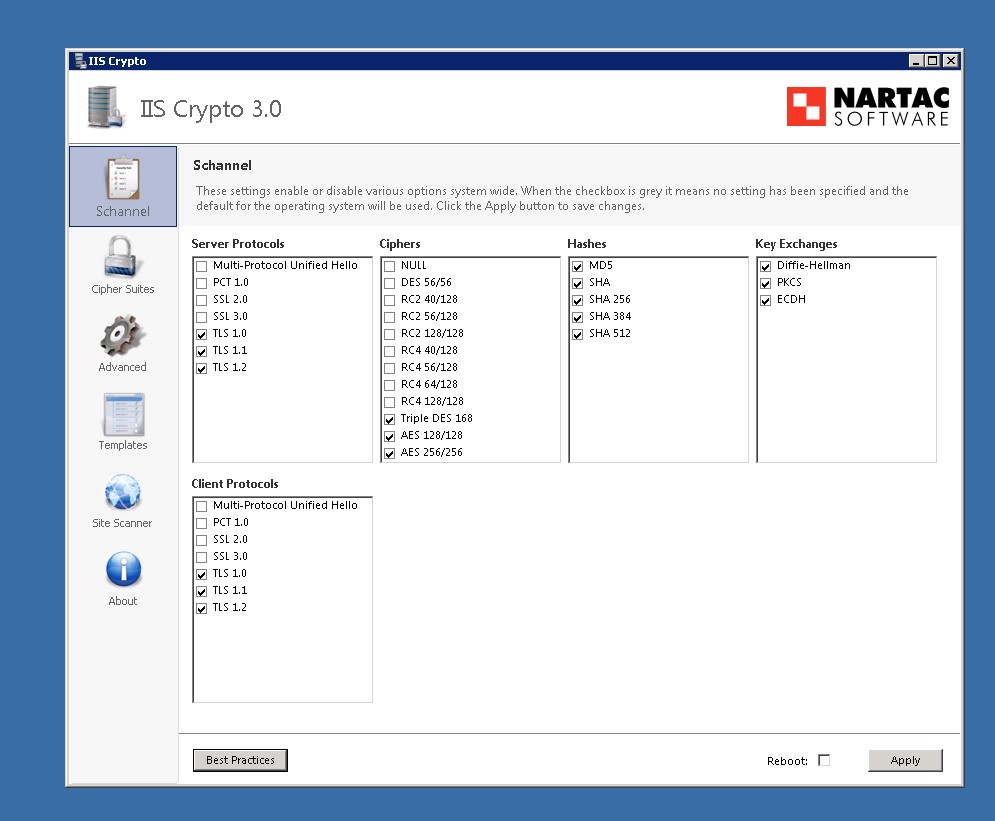
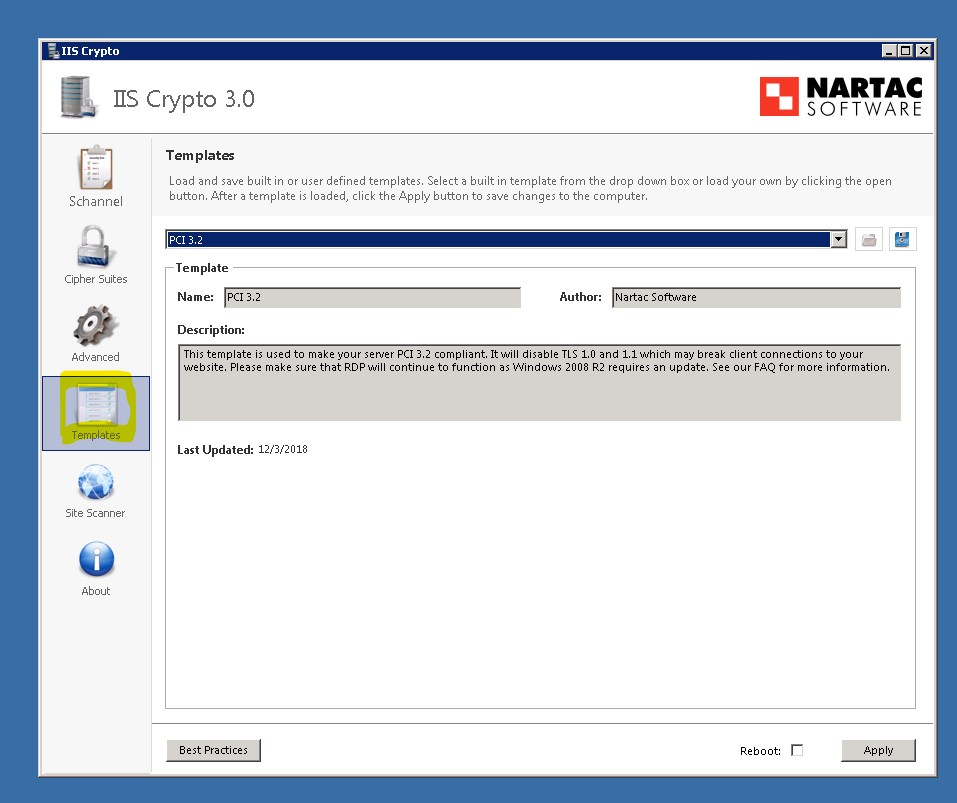
Using IISCrypto Tool we updated the Registry Files to update the TLS settings


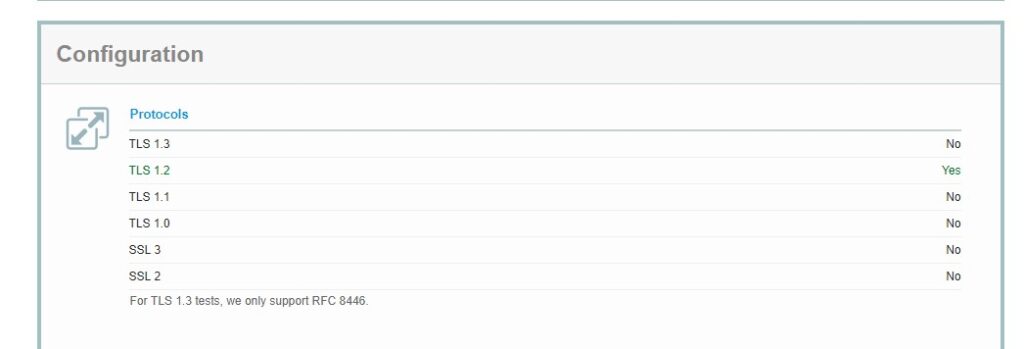
We ran another test using https://www.ssllabs.com/ssltest and the results showed TLS 1.0 and TLS1.1 where no longer available.


After we applied these changes and re-booted the server, the Twillio SMS messages where sent successfully.


However, the SQL Connection String began to break and the Classic ASP website where down.

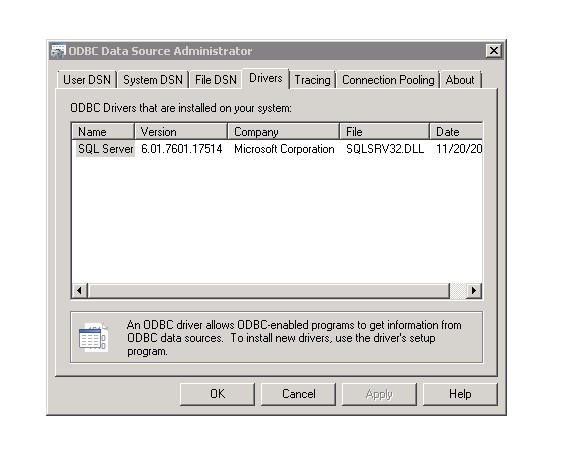
The SSL Connection was using “SQL Connection” ODBC driver.

We need to update to the latest ODBC to the lastest version which supports TLS 1.2  [Microsoft® ODBC Driver 13.1 for SQL Server]


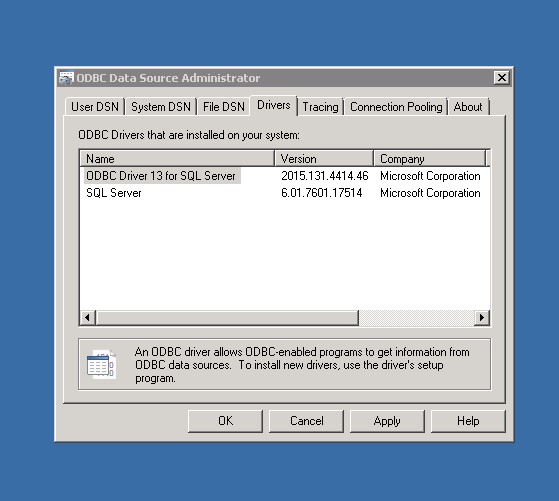
Then we need to update the connection string to use the current ODBC SQL 13 driver


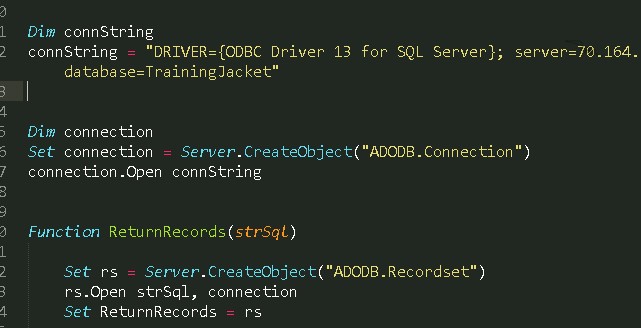
Now everything is working!

Advance Custom Field PRO Repeaters

Advance custom fields is a very powerful plugin for WordPress. In this blog post I will be teaching you how to use the Repeater field from Advance Custom Fields PRO. There are will be two steps that are required to get the Repeater working.

WordPress Admin

Log into the your site back in and make sure you have administrator privileges. If you do not have Advance Custom Fields PRO installed and the license activated please take time to do this.

Steps for creating the Repeater Field:

  • On the left hand side of your Dashboard there should be “Custom Fields”
  • This is where all the Field Groups are that you have created for your site. Press “Add New” on the top of the page
  • The first entry field is the title of the ACF. This will only be seen on the back end when a user is trying to add data. This can be whatever you want. For this demo I will be calling mine “Repeater Test”.
  • Next what you want to do is press the blue button that says “+ Add Field”. This is where we are going to create our repeater field.
    • Field Label: This is the title of the repeating element. For example: If you want a page to have multiple Icons, the Field Label will be “Icons”, If you want different display blocks the Field Label will be “Blocks”, etc.
    • Field Name: This is automatically generated when you add the first Field Label. This will be used when we are writing the Code. Make sure there are no spaces in this field. The best practice is to add a Field Label and use the auto generated name.
    • Field Type: For this example we are using Repeater. Note: If you do not have the PRO version there will be no Repeater for you to select.
    • Instructions: Displays to user on back end to explain how to add data
    • Required: If you want it to be required.
    • Sub Fields: These are the items that you want to be repeated. Press “+ Add Field”.
      • I will not be going over all of the options today. Just make sure you add a Field Label and Field Name so we can access the data in the code.
      • For my example I will be adding an Image (Image), Title (Text), and Description (Text).
      • *Note: For the Image there is an option called Return Value. My code will be handling “Image Array”.
    • The rest of the VALUES can be changed as you feel fit! This is all we need for my code.
  • Make sure you press “Publish” on the top to complete the process


Steps for adding Data:

  • If you chose to display the form on Post or Pages navigate to the correct Post or Page you wish for the data to be entered
  • Click “Add Row” and enter in the data.
  • Keep pressing “Add Row” until all the data is entered.
  • You can delete a row on the left hand column.
  • Or reorder the row by dragging the numbers on the left hand column

PHP Code

This part of the process it going to be more difficult. This will required previous knowledge on the PHP side of WordPress. I will no go over the process of finding the correct location to add the code but these are my recommendations. Either create a Page-current page if that is were the ACF is. Or Add a template part for the posts.

COPY AND PASTE THIS IN THE CORRECT POSITION:


Responsive image