Photos and steps are done in Android version KitKat 4.4.2.
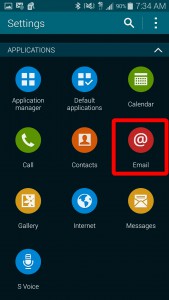
1. In “APPS” select “SETTINGS.”

2. In “SETTINGS” go to “EMAIL” located under the applications tab.

3. If this is your first email set up click “OK“when it asks to configure now. If this is not your first account go to “MANAGE ACCOUNTS” followed by selecting the “+” to add a new email account.
4. Add the “EMAIL ADDRESS“and “PASSWORD” fields then click next.
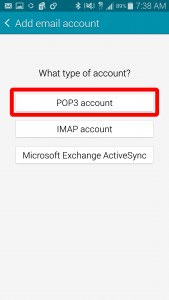
5. Select “POP3 ACCOUNT” when prompted for what type of account.

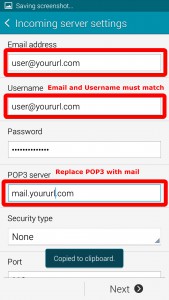
6. Make sure “EMAIL ADDRESS” and “USERNAME” are both set to the same email address. The username field does not default this so must be changed. On the same screen change the “POP3 SERVER” to “MAIL.YOURURL.COM” and insert the respective URL.

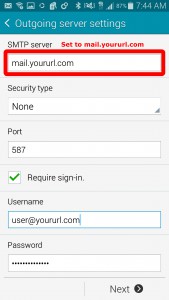
7. Make sure “SMTP SERVER” is set to “MAIL.YOURURL.COM” and insert your respective URL.

8. Account options can remain unchanged unless otherwise preferred.
9. Account name and display name can be set or left to their default values. Click “DONE” and the email will be created and synced.